IIS

IIS

Internet Information Services, also known as IIS, is a Microsoft web server that runs on Windows operating system and is used to exchange static and dynamic web content with internet users. IIS can be used to host, deploy, and manage web applications using technologies such as ASP.NET and PHP.

John Stephen Jacob Nallamu

20 Nov 2025

Installation and Initial setup for IIS

1. IIS Installation

Enable IIS Feature through Powershell and Restart the Windows Machine

dism.exe /online /enable-feature /featurename:IIS-WebServer /all
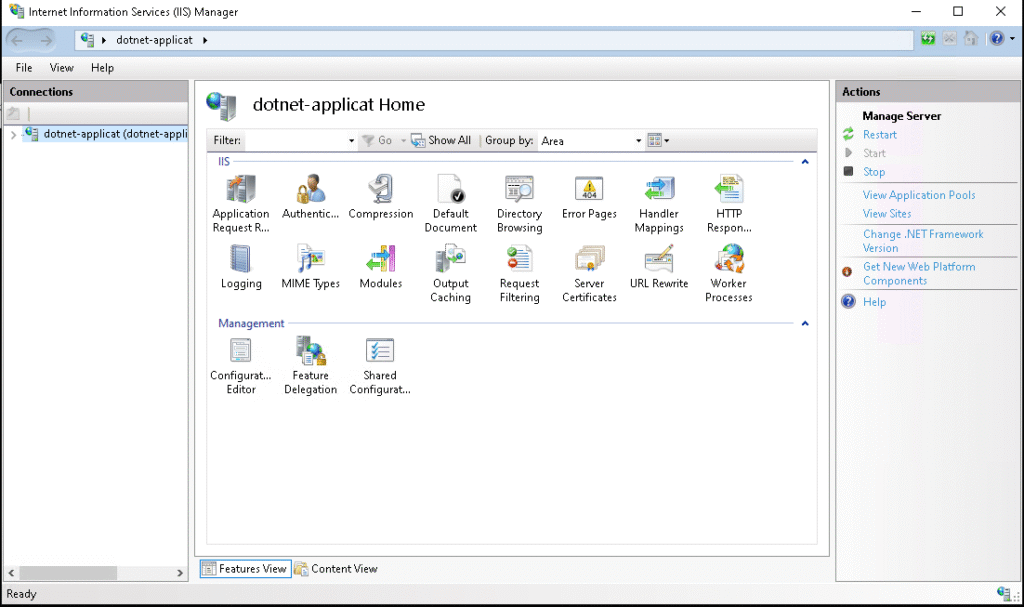
IIS something looks like this
2. Install Modules for IIS
a. Install Application Request Routing
b. Install URL Rewrite
https://learn.microsoft.com/en-us/iis/extensions/url-rewrite-module/using-url-rewrite-module-20
3. Setup Configuration for Reverse Proxy
a. Double click the Application Request Routing
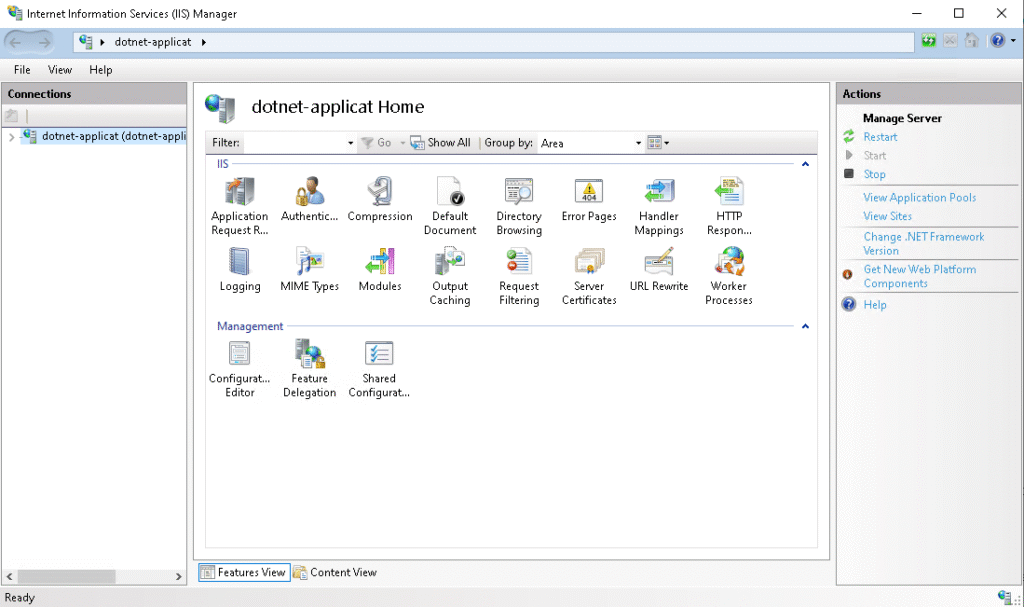
b. Click the Server proxy settings on Actions tab
c. Check the Enable proxy tick box
d. Apply the changes in the Actions tab

Use the Reverse Proxy method to host the Node.js Application in IIS

1. Add new site
a. First step is to run the Web Application locally or on a server
b. Then, Open IIS and right-click on the Site folder located in the Connections tab, and click the Add Website
c. Enter the new name for the site
d. Add any temporary path
e. Set a unique port number and then click OK
2. Add the NodeJS Application
a. Press Right-click on the Site that we created before
b. Enter a new name for your application
c. Browse to your Application Actual path and click OK
3. Add the NodeJS Localhost URL to IIS URL Rewrite
a. Select the Site you created just before and double-click on the URL Rewrite
b. Double click on the Add rules which is located  on Actions tab
c. Double-click on the Reverse Proxy 
d. Put the URL of your Application and Click OK
e. After creating the URL Rewrite, double-click on this Rewrite folder
f. There is one bug that needs to be sorted inside the rewrite folder, so double-click to get inside and change the duplicate “http://” URL to http://localhost:<port number>
g. Then apply the Changes, and you will now be able to use your NodeJS application in IIS

Use the Normal Method to host a .NET Core Application on IIS

Deploy and Host an ASP.NET CORE Application on IIS Tutorial
https://youtu.be/Q_A_t7KS5Ss?si=QczaDqbpIRnMhdfi
1. Install a .NET hosting bundle installer
Download the .NET hosting bundle and run it.
https://dotnet.microsoft.com/en-us/download/dotnet/thank-you/runtime-aspnetcore-8.0.0-windows-hosting-bundle-installer
2. Add the NodeJS Application
a. Right-click the Sites under the connections tab  and click the Add website
b. Put any name and select the New path for application, and also, if you have any domain name, set it in the hostname
3. Configure the Application Pool
  1. Go to the Application Pool under the Connections tab
  2. And double-click the application pool you previously created
  3. Edit the .NET CLR version to No Manage code
4. Publish the .NET Application to the site path
a. Locate your .NET application location, and then publish to the site path that you created before
dotnet publish -c Release -o < \path\to\sites >
b. Check whether the published files are successfully created or not. It would be Something like this
5. Refresh the Application Pool
  1. Select the Application Pool that you created before
  2. And recycle the Application Pool under the Actions tab

Create the SSL Certificate for IIS Sites

1. Download the Certify web tool
The Certify tool is used to create the SSL certificate for IIS Hosted Web sites
https://certifytheweb.com/
2. Create the Certificate
  1. Click the New Certificate


  2. Select your IIS Site Name in the Select site options
  3. And add your domain name in Add domains to certificates section
3. Check the Domain Certifications

The lock symbol indicates the SSL certification is Created Successfully

Building Multi-Platform Docker Images with Buildx

Building Multi-Platform Docker Images with Buildx

Karthik Senthil Kumar

20 Nov 2025

Introduction

When working with Docker, most developers start with the classic docker build command. While it’s great for local development, it has one major limitation — the built image is tied to the architecture of the machine it was created on.
For instance, an image built on an amd64 system will only run seamlessly on amd64 architecture. But what if your application also needs to run on arm64 devices such as Apple Silicon Macs or ARM-based cloud servers?
That’s where Docker Buildx comes in.

Why Multi-Platform Images Matter

Modern applications need to run consistently across diverse environments. Without multi-architecture support, your containers may fail on certain systems.
Using Docker Buildx, you can easily create and publish multi-platform images (e.g., amd64 and arm64) to your container registry — ensuring your containers run anywhere, without modification.
Step-by-Step: How to Build Multi-Platform Images with Buildx
  1. Create a Private Repository on Docker Hub : Start by creating a new repository in your Docker Hub account where you’ll push the image.
  1. Log In to Docker Hub/Image Repository : In this blog, I’m using Docker Hub to store the image.
docker login
Enter your Docker Hub username and password when prompted.
  1. Create a Dockerfile: Inside your application’s source directory, create a Dockerfile that defines how the image should be built.
  1. Create a New Builder Instance: By default, Docker uses the Docker driver, which doesn’t support multi-platform builds. To enable this feature, create a new builder instance using the Docker container driver
docker buildx create –name container-builder –driver docker-container –bootstrap –use
You can replace container-builder with any preferred name.
  1. Build and Push the Multi-Platform Image : Now, build and push the image for both amd64 and arm64 platforms
docker buildx build –platform linux/amd64,linux/arm64 -t <REPOSITORY:TAG> –push .

Flags Explained:

  • –platform → specifies target architectures
  • -t → tags the image with name and version
  • –push → pushes the image directly to Docker Hub

References

With this setup, your Docker images will seamlessly run across Intel/AMD and ARM architectures, ensuring reliable deployments in any environment.

Turning Downtime into Opportunity: DevOps Strategies for Handling 502 Bad Gateway Errors

Turning Downtime into Opportunity: DevOps Strategies for Handling 502 Bad Gateway Errors

We recently encountered the dreaded 502 Bad Gateway issue, but instead of letting it impact user trust, our DevOps team acted fast.

Peter Selva Ponseelan

20 Nov 2025

Introduction

As DevOps engineers, a few things strike fear like the infamous 502 Bad Gateway error. That gut-wrenching moment when your carefully maintained application suddenly fails, and users are met with a blank, lifeless page. Despite all our preparation, automation, and monitoring, downtime happens — and when it does, it’s not the error that defines us, but how we respond to it.
Recently, our DevOps Team faced this challenge head-on. Instead of letting the 502 error disrupt user experience, we built a custom maintenance page that transformed confusion into clarity and frustration into trust.
This post walks you through how we did it — turning downtime into an opportunity to reinforce reliability, transparency, and user confidence.

Why Downtime Doesn’t Have to Be a Disaster:

No system is immune to failure. Even the most robust infrastructure can experience unexpected interruptions due to updates, scaling issues, or dependency failures. But here’s the truth — users don’t expect perfection; they expect communication.
By providing a clear, friendly message during downtime, we can maintain user trust while our team resolves the issue. It’s a small step that makes a big impact.
Step 1: Preparing a Friendly Maintenance Page:
First, we need a static page to display when our services go offline.
Below is a simple yet elegant HTML maintenance page that you can customize to fit your brand:
<!DOCTYPE html>
<html lang=“en”>
<head>
    <meta charset=“UTF-8”>
    <meta name=“viewport” content=“width=device-width, initial-scale=1.0”>
    <title>Maintenance Mode</title>
    <style>
        body {
            display: flex;
            justify-content: center;
            align-items: center;
            height: 100vh;
            margin: 0;
            font-family: Arial, sans-serif;
            background: url(‘https://www.transparenttextures.com/patterns/clouds.png’) no-repeat center center fixed;
            background-size: cover;
            color: #333;
        }
        .container {
            text-align: center;
            background-color: rgba(255, 255, 255, 0.8);
            padding: 20px;
            border-radius: 8px;
            box-shadow: 0 4px 8px rgba(0, 0, 0, 0.2);
        }
        h1 { font-size: 4em; color: #2c3e50; }
        p { font-size: 1.5em; color: #34495e; }
        .footer { font-size: 1.2em; color: #777; }
        .bold-devops { font-weight: bold; color: #e74c3c; }
    </style>
</head>
<body>
    <div class=“container”>
        <h1>We’ll Be Back Soon!</h1>
        <p>Our server is currently taking a quick break for maintenance. Please check back shortly.</p>
        <p><span class=“bold-devops”>Contact DevOps Admin</span> if you need urgent support.</p>
        <div class=“footer”>&copy; Team Ops</div>
    </div>
</body>
</html>
Save this as index.html under /var/www/html/.
This directory is the default web root for many Linux distributions and is ideal for lightweight servers such as Nginx, Apache, or even a Python HTTP server.
Step 2: Serving the Maintenance Page (Nginx Configuration)
To serve your maintenance page, create a simple Nginx configuration file:

server {
    listen 80;
    server_name <server_ip>;

    root /var/www/html;
    index index.html;

    location / {
        try_files $uri $uri/ =404;
    }
}

Once set up, your users will see this clean, informative maintenance page instead of the dreaded 502 screen.
Step 3: Handling Reverse Proxy Failures Gracefully
If your application runs behind a reverse proxy (like Nginx) — for instance, serving an app on port 3000 — you can make your setup even smarter.
When the backend app fails (502, 503, or 504), Nginx can automatically redirect users to the maintenance page rather than showing an error.
Here’s an example:
server {
    listen 80;
    server_name www.example.com;

    location / {
        proxy_pass http://localhost:3000;
        proxy_redirect off;
        proxy_http_version 1.1;
        proxy_set_header Upgrade $http_upgrade;
        proxy_set_header Connection “upgrade”;

        error_page 502 503 504 = @fallback;
    }

    location @fallback {
        root /var/www/html;
        try_files /index.html =502;
    }
}
This ensures that even when your backend is down, users still see a reassuring message — not an alarming error.

Turning Downtime into a Trust-Building Moment

A professional maintenance page is more than just a visual placeholder — it’s a communication bridge between your team and your users. It shows that you care about transparency, reliability, and user experience, even when things go wrong.
By implementing this simple practice, you transform outages into opportunities to build trust.

Final Thoughts

Downtime is inevitable — but how you handle it defines your success as a DevOps engineer. Instead of letting a 502 Bad Gateway error create panic, use it as a chance to communicate, reassure, and strengthen relationships with your users.
A friendly, informative maintenance page is a small but powerful gesture that speaks volumes about your professionalism and empathy.

Note to DevOps Teams

Thank you for taking the time to read this post.
Your commitment to learning, improving, and sharing knowledge makes the DevOps community stronger.
Let’s continue to collaborate, innovate, and build systems that not only recover quickly — but handle failures gracefully.

Remember:

Downtime is inevitable. But how we respond to it makes all the difference.

Debugging AKS Certificate Issues: When Let’s Encrypt Rate Limits Strike Your Kubernetes Cluster

Debugging AKS Certificate Issues: When Let’s Encrypt Rate Limits Strike Your Kubernetes Cluster

A complete guide to understanding, diagnosing, and solving certificate provisioning failures in Azure Kubernetes Service

Aravindan Thangaiah

20 Nov 2025

The Problem That Stopped Our Deployment

Picture this: You’re working on a Kubernetes deployment in Azure Kubernetes Service (AKS), everything seems configured correctly, but suddenly your Application Gateway Ingress Controller (AGIC) starts throwing errors:
Unable to find the secret associated to secretId: [test-lab/test-lab]
Source: azure/application-gateway ingress-appgw-deployment-79d86b4bf4-kczvg
Count: 4
Your ingress is configured, cert-manager is installed, but somehow your TLS secrets aren’t being created. Sound familiar? You’re not alone.

The Investigation Journey

Step 1: Check if Secrets Exist
The first step in any Kubernetes mystery is verification. Let’s check if our secrets actually exist:
kubectl get secrets –all-namespaces | Select-String “test-lab”
Result: Nothing. The secret doesn’t exist anywhere in the cluster.
Step 2: Examine the Ingress Configuration
Looking at our ingress resource, everything appeared correct:Looking at our ingress resource, everything appeared correct:
apiVersion: networking.k8s.io/v1
kind: Ingress
metadata:
  name: test-lab
  namespace: test-lab
spec:
  rules:
  - host: test-lab.test.com
    http:
      paths:
      - backend:
          service:
            name: test-lab
            port:
              number: 80
        path: /
        pathType: Prefix
  tls:
  - hosts:
    - test-lab.test.com
    secretName: test-lab  # cert-manager should create this secret
The ingress was referencing a secretName: test-lab, but that secret didn’t exist. Since we’re using cert-manager, it should automatically create this secret.
Step 3: Check Certificate Resources
This is where the real detective work began:
kubectl get certificates -n test-lab
Output:
NAME       READY   SECRET     AGE
test-lab    False   test-lab    12m
api-test   False   test   12m
Both certificates were stuck in False state for 12 minutes. Something was preventing cert-manager from successfully provisioning our certificates.

The Root Cause Discovery

The breakthrough came when we described the certificate resource:
kubectl describe certificate test-lab -n test-lab

The smoking gun:

Message: The certificate request has failed to complete and will be retried:

Failed to wait for order resource “test-lab-1-324203979” to become ready:

order is in “errored” state: Failed to create Order:

429 urn:ietf:params:acme:error:rateLimited:
too many certificates (5) already issued for this exact set of identifiers in the last 168h0m0s, retry after 2025-09-16 21:22:00 UTC

Eureka! We had hit Let’s Encrypt’s rate limiting.

Understanding Let’s Encrypt Rate Limits

What Exactly Is Rate Limiting?
Let’s Encrypt implements several rate limits to prevent abuse and ensure their free service remains available to everyone. The specific limit we encountered is called “Duplicate Certificate Limit”.

The Specific Rate Limit We Hit

  •  Limit:5 certificates per exact set of identifiers (domain names) per week
  • Window: Rolling 7-day (168-hour) period
  • Scope: Exact same domain name(s) in the certificate
  • Reset: When the oldest certificate ages out of the 7-day window

Why This Happens in Development Environments

Common Scenarios Leading to Rate Limit Hits:
  • Rapid Development Iterations
    • Frequent cluster rebuilds during testing
    • Multiple deployment attempts while debugging configurations
    • Testing different cert-manager configurations
  • Configuration Mistakes
    • Incorrect ingress annotations causing cert-manager to repeatedly retry
    • Missing or misconfigured ClusterIssuers
    • DNS validation failures leading to retry loops
  • Kubernetes-Specific Issues
    • cert-manager losing state during cluster operations
    • Secrets getting accidentally deleted
    • Namespace recreation removing existing certificates

The Solution Toolkit

Immediate Solutions
Option 1: Wait It Out (Production Approach)

The error message tells us exactly when the rate limit resets:

retry after 2025-09-16 21:22:00 UTC
For production environments, waiting is often the most appropriate solution.
Option 2: Use a Different Domain (Quick Fix)
Change your domain to bypass the rate limit:
spec:
rules:
– host: testlab-v2.test.com

tls:
– hosts:
  – testlab-v2.test.com
  secretName: testlab-v2
Option 3: Switch to Let’s Encrypt Staging
For development environments, use the staging environment:

metadata:
annotations:
  cert-manager.io/cluster-issuer: “letsencrypt-staging”

The staging environment has much higher rate limits (30,000 certificates per week).
Option 4: Create Temporary Self-Signed Certificates
Unblock your application immediately:
# Generate self-signed certificate
openssl req -x509 -nodes -days 30 -newkey rsa:2048 \
-keyout api-lab.key –out api-lab.crt \
-subj “/CN=test-lab.test.com”
# Create the secret
kubectl create secret tls test-lab \
–cert=test-lab.crt –key=test-lab.key \
-n test-lab

Prevention Strategies

1. Environment Separation

Use different subdomains for different environments:

  • api-dev.yourdomain.com – Development
  • api-staging.yourdomain.com – Staging
  • api.yourdomain.com – Production
2. Development Best Practices
apiVersion: cert-manager.io/v1
kind: ClusterIssuer
metadata:
name: letsencrypt-staging
spec:
acme:
  server: https://acme-staging-v02.api.letsencrypt.org/directory
3. Certificate Backup and Restore
Backup your working certificates:
kubectl get secret test-lab -n test-lab -o yaml > test-lab-backup.yaml
Restore when needed:
kubectl apply -f testlab-backup.yaml
4. Monitoring and Alerting
Set up monitoring for certificate status:
kubectl get certificates –all-namespaces -o custom-columns=NAMESPACE:.metadata.n

Diagnostic Commands Cheat Sheet

Here’s your troubleshooting toolkit:
kubectl get secrets –all-namespaces | SelectString “your-secret-name”
# Check certificate status
kubectl get certificates -n your-namespace
# Get detailed certificate information (MOST IMPORTANT COMMAND)
kubectl describe certificate your-cert-name -n your-namespace
# Describe all certificates in a namespace
kubectl describe certificates -n your-namespace
# Get detailed certificate information in YAML format
kubectl get certificate your-cert-name -n your-namespace -o yaml
# Check certificate requests and their details
kubectl get certificaterequests -n your-namespace
kubectl describe certificaterequests -n your-namespace
# Check cert-manager logs for errors
kubectl logs -n cert-manager -l app=cert-manager –tail=50
# Check ACME challenges (for Let’s Encrypt debugging)
kubectl get challenges -n your-namespace
kubectl describe challenges -n your-namespace
# Check ClusterIssuers and their status
kubectl get clusterissuers
kubectl describe clusterissuer your-issuer-name
# Check Issuers (namespace-scoped)
kubectl get issuers -n your-namespace
kubectl describe issuer your-issuer-name -n your-namespace
# Find all ingress resources using a specific domain
kubectl get ingress –all-namespaces -o yaml | Select-String “your-domain.com” -Context 3
# Check orders (ACME-specific resources)
kubectl get orders -n your-namespace
kubectl describe orders -n your-namespace

Key Takeaways

  1. Always check certificate status first when TLS secrets are missing
  2. Let’s Encrypt rate limits are real and hit development environments frequently
  3. Use staging environment for development to avoid production rate limits
  4. Domain separation is crucial for multi-environment setups
  5. Monitor certificate health as part of your operational practices
  6. Backup working certificates before making changes

Conclusion

Certificate management in Kubernetes can be tricky, especially when external services like Let’s Encrypt impose rate limits. The key is understanding the tools at your disposal and having a systematic approach to diagnosis. Remember: that cryptic “secret not found” error might actually be a rate limiting issue in disguise. Always dig deeper with kubectl describe commands to get the full picture. The next time you see certificate provisioning failures, you’ll know exactly where to look and how to resolve them quickly.